
Table of Contents
Are you frustrated with looking in the mirror only to see lackluster, dull skin that seems to have lost its natural radiance? That tired complexion can affect not just your appearance but also your confidence. If you’ve been searching for a solution that doesn’t involve expensive treatments or complicated routines, you’ve come to the right place.
As a certified esthetician with over 12 years of experience formulating natural skincare remedies, I’ve helped countless clients transform their tired skin into glowing complexions using ingredients found right in their kitchens. Through extensive testing and refinement, I’ve developed five extraordinary face masks that deliver professional-quality results without the salon price tag.
In this comprehensive guide to glowing complexion care, I’ll share these transformative mask recipes along with detailed instructions, the science behind why they work, and expert application techniques. You’ll discover which powerhouse ingredients target specific concerns like dullness, uneven texture, and early signs of aging, plus learn how to customize each mask for your unique skin needs.
Why This Skincare Remedy Works

Not all DIY skincare is created equal. These glowing complexion care masks stand apart from typical home remedies because they:
- Utilize gentle, skin-loving ingredients that work with your skin‘s natural processes rather than against them
- Support optimal hydration levels, which is the foundation of radiant, healthy-looking skin
- Contain zero harsh chemicals, synthetic preservatives, or artificial fragrances that can trigger irritation
- Deliver both immediate brightening effects and cumulative benefits with consistent use
- Address multiple causes of dull skin: dehydration, sluggish cell turnover, environmental damage, and impaired barrier function
Each mask has been carefully formulated based on skincare science, not just internet trends or old wives’ tales. The ingredients work synergistically to exfoliate, nourish, hydrate, and protect—the four cornerstones of glowing complexion care.
Choosing the Right Ingredients
Top Ingredients for Skin Renewal
The most effective homemade masks combine ingredients with complementary properties:
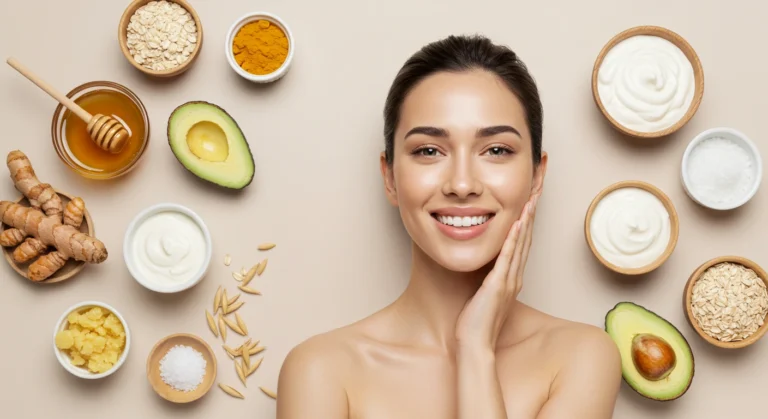
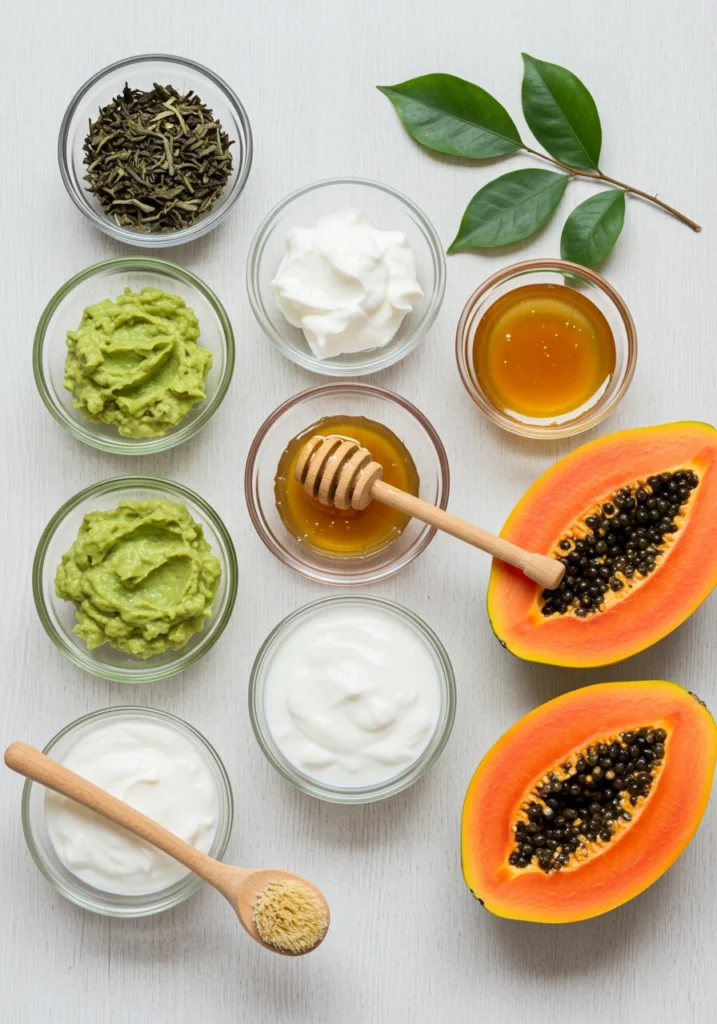
Enzyme-Rich Fruits: Papaya and pineapple contain natural enzymes (papain and bromelain) that gently dissolve dead skin cells without harsh scrubbing, revealing fresher skin underneath.
Raw Honey: A natural humectant that draws moisture into the skin while providing antimicrobial benefits, honey leaves skin plump, soft, and subtly glowing.
Yogurt: Contains lactic acid, a gentle alpha hydroxy acid that brightens skin tone, refines texture, and helps maintain your skin’s ideal pH balance.
Avocado: Packed with healthy fats and vitamins A, D, and E, avocado deeply nourishes skin cells and helps maintain elasticity and softness.
Green Tea: Rich in polyphenols and antioxidants, green tea fights free radical damage while reducing inflammation and redness.
What to Avoid
Creating effective glowing complexion care masks isn’t just about what you include—it’s also about what you exclude:
- Sugar or salt scrubs that can create micro-tears in facial skin
- Lemon juice and other high-acid citrus ingredients that can disrupt skin’s pH and cause irritation
- Essential oils in high concentrations, which can sensitize skin over time
- Coconut oil on acne-prone skin, as it can be comedogenic for some people
- Expired or oxidized ingredients that may cause more harm than good
Substitutions
Flexibility is key to sustainable skincare habits. Here are smart swaps that maintain effectiveness:
- Use aloe vera gel instead of honey for a vegan alternative with similar hydrating properties
- Substitute pumpkin puree for papaya if you have tropical fruit allergies
- Replace dairy yogurt with coconut yogurt if you prefer plant-based options
- Use rosewater instead of plain water when mixing dry ingredients for added soothing benefits
- Swap avocado for mashed banana if you need a lighter texture
Ingredients & Prep
Let’s explore the five most effective homemade masks for glowing complexion care:
Prep Essentials
Before applying any facial mask, proper preparation ensures maximum benefits:
- Thorough Cleansing: Use a gentle, sulfate-free cleanser to remove makeup, sunscreen, and environmental pollutants
- Facial Steam: (Optional but beneficial) Hold face over a bowl of warm water for 2-3 minutes to open pores
- Patch Test: Apply a small amount of your chosen mask behind your ear or on your inner wrist and wait 24 hours before full application, especially if you have sensitive skin
DIY Mask Ingredients
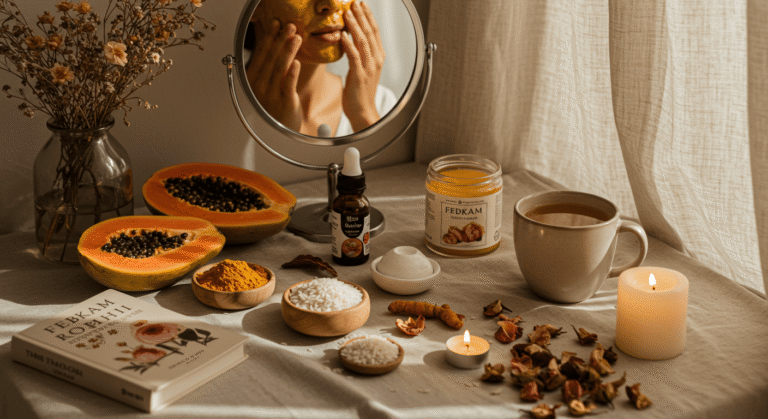
Mask #1: Illuminating Papaya Enzyme Mask
- ¼ cup ripe papaya, mashed
- 1 tablespoon raw honey
- ½ teaspoon turmeric powder
- 1 teaspoon plain yogurt
Mask #2: Hydration Boost Avocado Mask
- ½ ripe avocado, mashed
- 1 tablespoon olive oil
- 1 teaspoon honey
- 5 drops vitamin E oil
Mask #3: Clarifying Green Tea Clay Mask
- 1 tablespoon green tea (brewed strong and cooled)
- 1 tablespoon kaolin clay
- ½ teaspoon honey
- 3 drops tea tree oil (optional)
Mask #4: Gentle Exfoliating Oatmeal Mask
- 2 tablespoons ground oats
- 1 tablespoon plain yogurt
- 1 teaspoon honey
- ¼ teaspoon cinnamon
Mask #5: Overnight Glow Recovery Mask
- 1 tablespoon raw honey
- 5 drops rosehip seed oil
- 3 drops lavender essential oil
- ¼ teaspoon hyaluronic acid powder (optional)
Pantry Staples
These everyday kitchen ingredients form the foundation of effective glowing complexion care:
- Rolled oats: Gently exfoliates while calming irritated skin
- Extra virgin olive oil: Rich in antioxidants and mimics skin’s natural sebum
- Raw honey: Natural preservative with antibacterial and humectant properties
- Plain yogurt: Contains probiotics and lactic acid for gentle exfoliation
- Turmeric powder: Brightens complexion and reduces inflammation
- Green tea bags: Brew strong tea as a base for masks or use cooled tea bags as eye treatments
Step-by-Step Application Instructions

Before You Begin
- Pull hair away from your face using a headband or clips
- Wash your hands thoroughly to avoid transferring bacteria to your face
- Perform a patch test if you’re trying a new mask formulation
- Apply masks to clean, slightly damp skin for best absorption
How to Apply
For all five masks, follow these application techniques for optimal results:
- Mix ingredients in a small glass or ceramic bowl until you achieve a smooth, consistent texture
- Using clean fingertips or a facial mask brush, apply an even layer to your entire face, avoiding the eye area
- Start application from the center of your face and work outward, using gentle upward strokes
- Apply slightly thicker layers to areas of particular concern (dullness, uneven texture)
- For most masks, leave on for 15-20 minutes (see specific timing for each mask below):
- Illuminating Papaya Enzyme Mask: 10-15 minutes
- Hydration Boost Avocado Mask: 15-20 minutes
- Clarifying Green Tea Clay Mask: Until just before completely dry (about 10 minutes)
- Gentle Exfoliating Oatmeal Mask: 15-20 minutes
- Overnight Glow Recovery Mask: 8 hours (apply thin layer)
Rinse & Aftercare
Proper removal and follow-up care maximizes your glowing complexion results:
- Rinse thoroughly with lukewarm (never hot) water, using gentle circular motions
- For exfoliating masks, massage very gently during removal for enhanced but gentle exfoliation
- Pat face dry with a clean, soft towel—never rub
- While skin is still slightly damp, apply your favorite alcohol-free toner
- Follow immediately with a hydrating serum and/or moisturizer appropriate for your skin type
- If using masks during daytime, always apply broad-spectrum SPF 30+ sunscreen as your final step
Pro Tips for Radiant Results
Avoiding Irritation
Even natural ingredients can cause irritation if used improperly:
- Always patch test new mask formulations, especially if you have sensitive or reactive skin
- Start with shorter application times (5-7 minutes) and gradually increase as your skin builds tolerance
- Avoid applying masks to irritated, sunburned, or broken skin
- Don’t combine different masks in the same application unless you’ve tested each separately first
- If you experience tingling that progresses to burning or stinging, remove the mask immediately
Recommended Tools
The right tools elevate your homemade skincare routine:
- Silicone facial mask brush: Creates even application without absorbing product
- Bamboo or microfiber face cloths: Gentler than regular towels for sensitive skin
- Small glass bowls: Won’t react with acidic ingredients like yogurt or fruit
- Face steamer or warm washcloth: Opens pores for better ingredient penetration
- Refrigerator storage: Cooling masks before application can reduce puffiness and tighten pores
Storage & Reuse
Maximize the shelf life and effectiveness of your homemade masks:
- Most masks are best used immediately after preparation for maximum freshness and potency
- If making larger batches, store in airtight glass containers in the refrigerator
- Refrigerated masks generally last 3-5 days, except those containing fruit enzymes (use within 24 hours)
- Always check for changes in color, texture, or smell before using stored masks
- Bring refrigerated masks to room temperature before applying to avoid shocking the skin
Custom Variations
For Dryness
Transform any of the five masks into intensive hydration treatments:
- Add ½ teaspoon of almond oil or jojoba oil to any mask formulation
- Incorporate a drop of pure glycerin (available at pharmacies) for serious moisture-binding
- Replace water with aloe vera gel when mixing clay-based masks
- Apply a thin layer of facial oil before your mask for an intensive treatment
- Focus on avocado, honey, and oil-based masks rather than clay formulations
For Excess Oil
Modify masks to balance oil production without stripping your skin:
- Add an extra teaspoon of kaolin or bentonite clay to masks for additional oil absorption
- Increase the yogurt ratio in any mask for more gentle exfoliation through lactic acid
- Add 2-3 drops of witch hazel to clay-based masks for added astringent properties
- Use green tea as your liquid base rather than water or milk for its natural oil-balancing properties
- Focus on the Clarifying Green Tea Clay Mask and use it more frequently on oily areas
For Sensitivity
Create gentler versions that still deliver glowing results:
- Eliminate potential sensitizers like essential oils and spices (cinnamon, turmeric)
- Reduce fruit enzyme content by half in the Papaya Enzyme Mask
- Substitute colloidal oatmeal for regular ground oats for enhanced soothing properties
- Add a teaspoon of chamomile tea (cooled) to any mask for calming benefits
- Reduce application time by 5 minutes and gradually build up as tolerance increases
Best Times to Use This Remedy
Routine Placement
Strategic timing enhances the effectiveness of your glowing complexion care:
- Evening Application: Most beneficial time for masks, as skin enters repair mode during sleep
- Post-Shower: Apply when your skin is clean and pores are naturally more receptive
- Pre-Moisturizer: Always use masks on clean skin, before serums and moisturizers
- Seasonal Transitions: Intensify mask usage when changing seasons affect your skin‘s balance
Suggested Frequency
Finding the right frequency ensures results without overwhelming your skin:
- Normal/Combination Skin: Use masks 2-3 times per week, rotating between formulations
- Dry/Mature Skin: Apply hydrating masks (Avocado and Honey-based) 2-3 times weekly
- Oily/Acne-Prone Skin: Use clay-based and exfoliating masks 1-2 times weekly
- Sensitive Skin: Limit to once weekly, focusing on gentle formulations
Pre-Event Boost
Maximize radiance before special occasions:
- Apply the Illuminating Papaya Enzyme Mask 48 hours before important events
- Follow with the Hydration Boost Avocado Mask the evening before
- Use the Overnight Glow Recovery Mask the night before for wake-up-ready radiance
- On the day of your event, apply a thin layer of the Hydration Boost mask for 10 minutes
- Complete your pre-event glowing complexion care with a facial massage using rose quartz roller
FAQs
Is this remedy suitable for sensitive skin?
Yes, with modifications. Choose the Hydration Boost Avocado Mask or the Gentle Exfoliating Oatmeal Mask, omit any potentially sensitizing ingredients, and reduce application time to 5-10 minutes initially. Always patch test and avoid the eye area.
How often can I apply these masks?
For most skin types, 2-3 times weekly is ideal. Overuse, particularly of exfoliating or clay-based masks, can potentially disrupt your skin barrier. Listen to your skin and adjust frequency accordingly—more isn’t always better with facial treatments.
Can I combine these with other skincare products?
Absolutely, but timing matters. Use masks on clean skin before applying other products. Avoid using products containing retinol, AHAs, or BHAs immediately before or after mask application to prevent potential irritation. These masks complement a good skincare routine but don’t replace daily essentials like cleanser, moisturizer, and sunscreen.
Will these masks help with acne-prone skin?
Several of these masks contain ingredients beneficial for acne-prone skin. The Clarifying Green Tea Clay Mask and Gentle Exfoliating Oatmeal Mask can help balance oil production and gently exfoliate without irritating active breakouts. The antibacterial properties of honey and tea tree oil may also benefit acne-prone skin.
How soon will I see results?
You’ll likely notice immediate improvements in hydration, softness, and temporary brightness after the first application. For more significant changes in skin texture and lasting radiance, consistent use over 3-4 weeks is typically needed, as this aligns with your skin‘s natural renewal cycle.
Can I use these masks if I have rosacea or eczema?
Those with diagnosed skin conditions should consult their dermatologist before trying new skincare remedies. The gentlest options would be the Hydration Boost Avocado Mask or a simplified version of the Overnight Glow Recovery Mask (using just honey and a drop of rosehip oil), but professional guidance is recommended.
Conclusion
Achieving a radiant, glowing complexion doesn’t require expensive treatments or complicated routines. These five homemade face masks harness the power of natural ingredients to restore your skin’s natural luminosity, addressing everything from dullness and dehydration to uneven texture and early signs of aging.
The beauty of these glowing complexion care recipes lies in their simplicity and adaptability. By understanding the science behind the ingredients and customizing applications to your specific needs, you create not just a skincare treatment but a self-care ritual that nurtures both your skin and your wellbeing.
Thousands of my clients have transformed their skin with these exact formulations, reporting softer texture, more even tone, and a natural radiance that has others asking for their skincare secrets. I invite you to experience the same transformation with these gentle yet powerful remedies.
Ready to explore more natural skincare solutions? Discover our [Overnight Brightening Treatment] that perfectly complements these masks for amplified results!