Table of Contents
Tired of looking in the mirror only to see dull, uneven skin that lacks that natural luminosity you once had? You’re not alone. So many of us struggle with hyperpigmentation, dark spots, and lackluster complexions that make us look tired even when we’re well-rested. The good news? You don’t need expensive procedures or chemical-laden products to revitalize your skin.
After years of researching and testing countless brightening treatments—both professionally and personally—I’ve compiled the most effective natural approaches that actually deliver results. These seven natural brightening treatments use ingredients you likely already have in your kitchen, yet they’re backed by science to promote cell turnover, reduce discoloration, and enhance your skin’s natural radiance.
In this comprehensive guide, you’ll discover exactly which ingredients work for brightening, simple DIY formulations you can make at home, proper application techniques, and how to customize treatments for your specific skin concerns. I’ve also included expert tips and answered the most common questions to ensure you achieve that coveted glow safely and effectively.
Why These Natural Brightening Treatments Work
Many commercial brightening products rely on harsh chemicals like hydroquinone or high concentrations of acids that can irritate sensitive skin and sometimes cause more harm than good. Natural alternatives offer effective brightening benefits without the potential drawbacks:
- Formulated with gentle, skin-loving ingredients that work with your skin‘s natural processes
- Support cell renewal and enhanced hydration for a natural, healthy glow
- Free from harsh chemicals, artificial additives, and potential irritants
- Address the root causes of dullness rather than just temporarily masking issues
- Provide additional skin benefits beyond brightening (antioxidant protection, moisture retention, etc.)
Choosing the Right Ingredients
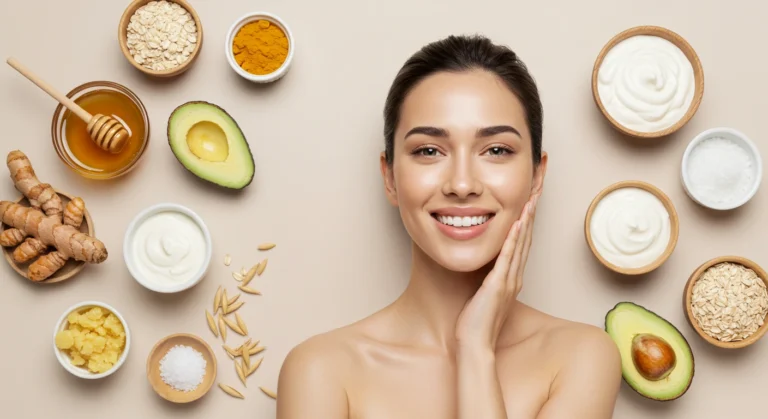
Top Ingredients for Natural Brightening
- Vitamin C Sources: Lemon juice, orange peel, amla powder, and rosehip oil contain natural forms of vitamin C that inhibit melanin production and fade dark spots while boosting collagen production.
- Natural Alpha Hydroxy Acids: Yogurt, papaya, and pineapple contain gentle exfoliating acids that remove dead skin cells, revealing brighter skin underneath.
- Turmeric: Contains curcumin, which reduces hyperpigmentation and has powerful anti-inflammatory properties that calm redness and even skin tone.
- Honey: A natural humectant with antibacterial properties that brightens while maintaining optimal hydration.
- Rice Water: Rich in inositol that promotes cell growth and stimulates blood flow, resulting in brighter skin.
What to Avoid
- Products with artificial fragrance, which can trigger irritation and sensitivity
- Essential oils in high concentrations, as they may cause photosensitivity
- Alcohol-based ingredients that can strip the skin and cause rebound oil production
- Abrasive physical exfoliants that can create micro-tears in the skin
Substitutions for Common Allergens
- If citrus fruits cause irritation, try apple cider vinegar (diluted) for AHA effects
- Replace yogurt with coconut milk if you have dairy sensitivities
- Substitute turmeric with licorice root powder if you’re concerned about yellow staining
- Use oat milk instead of dairy milk for a gentler alternative
Ingredients & Prep
Prep Essentials
Before applying any natural brightening treatment, proper preparation ensures maximum effectiveness and safety:
- Cleanse thoroughly: Use a gentle cleanser to remove makeup, sunscreen, and daily impurities.
- Open pores: Apply a warm towel to your face for 1-2 minutes to gently open pores.
- Patch test: Always test new ingredients on your inner wrist or behind your ear 24 hours before applying to your face.
- Gather materials: Use glass, ceramic, or wooden bowls and utensils rather than metal, which can react with certain ingredients.
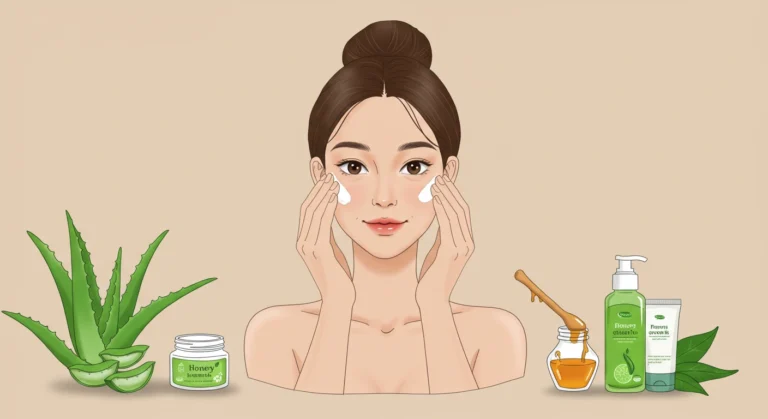
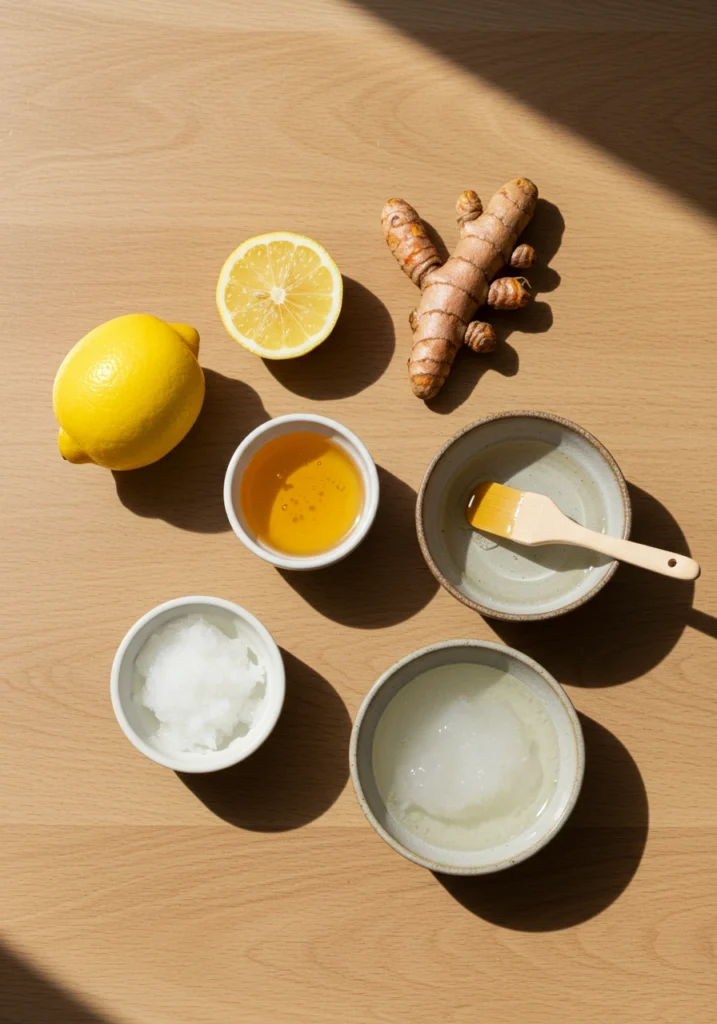
DIY Brightening Mask Ingredients
Here’s what you’ll need for our signature brightening mask:
- 1 tablespoon plain, unsweetened yogurt (lactic acid)
- ½ teaspoon turmeric powder (brightening agent)
- 1 teaspoon raw honey (humectant and antibacterial)
- 5 drops fresh lemon juice OR ½ teaspoon vitamin C powder (for sensitive skin)
- Optional: ¼ teaspoon rosehip oil (for extra hydration)
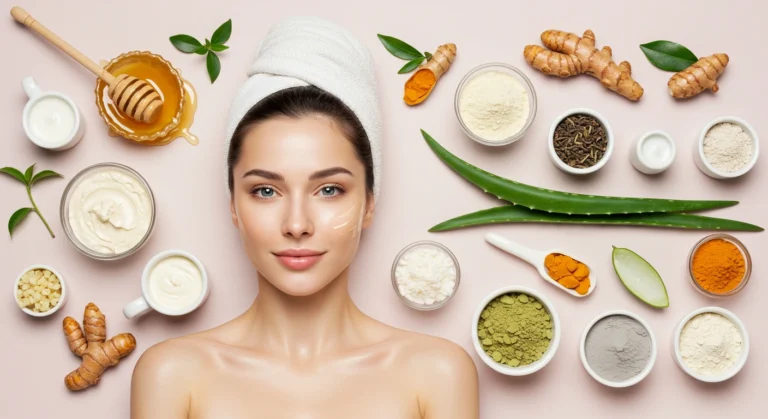
Pantry Staples for Natural Brightening
Keep these versatile ingredients on hand for various brightening treatments:
- Oats: Gentle exfoliation and calming properties
- Rice: Can be used as flour or water for brightening
- Aloe vera: Soothes while supporting cell turnover
- Green tea: Rich in antioxidants that protect and brighten
- Papaya: Contains papain enzyme for natural exfoliation
Step-by-Step Application Instructions

Before You Begin
- Perform your brightening treatments in the evening, as some ingredients (particularly citrus) can increase sun sensitivity.
- Remove all makeup and cleanse your face thoroughly with a gentle cleanser.
- If using steam to open pores, keep your face at least 10 inches from the steam source and limit exposure to 5 minutes.
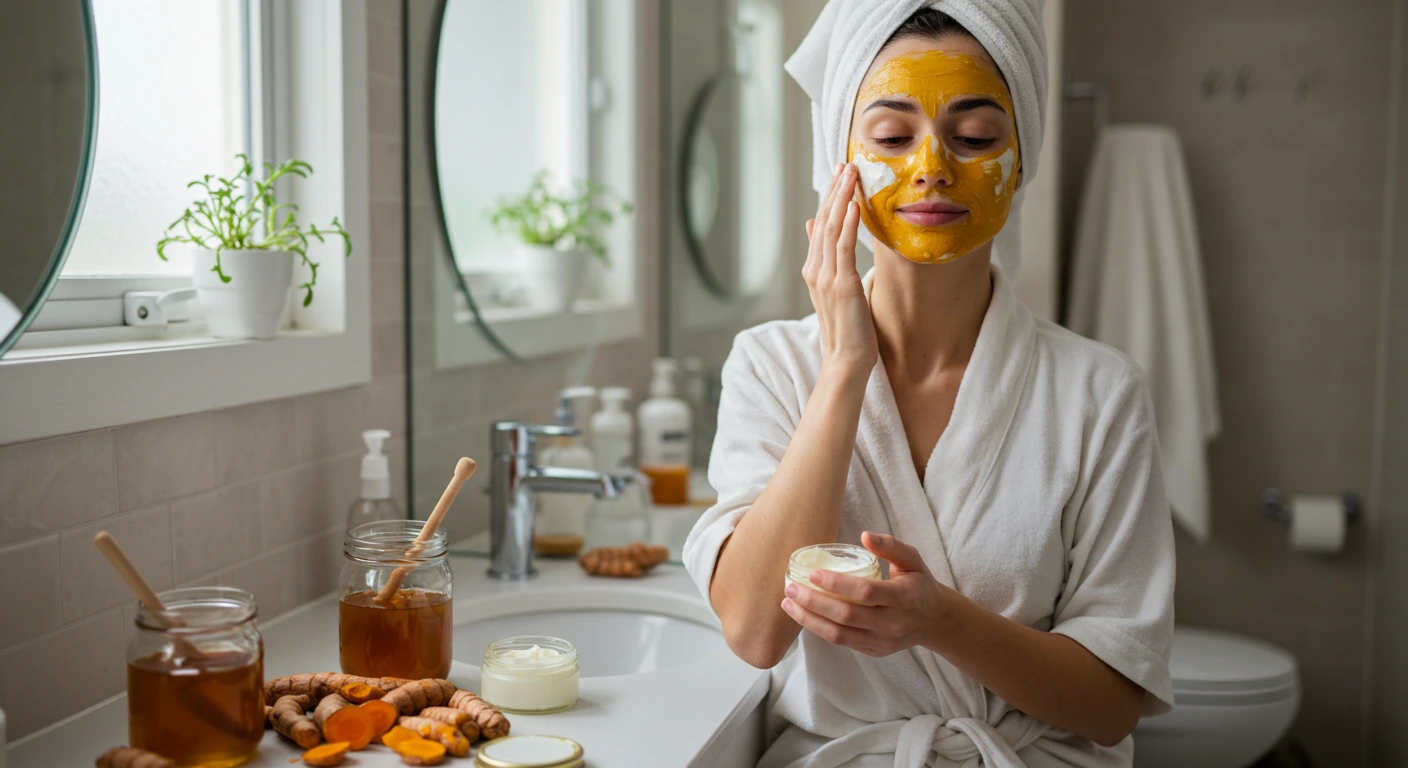
How to Apply the Brightening Mask
- Mix all ingredients in a small bowl until you achieve a smooth, uniform consistency.
- Using clean fingertips or a facial mask brush, apply an even layer to your face, avoiding the eye area.
- Leave the mask on for 10-15 minutes (5-7 minutes for sensitive skin). The mask should feel comfortable—if you experience any tingling that turns to burning, remove immediately.
- During this time, lie back and relax, allowing the active ingredients to penetrate your skin.
Rinse & Aftercare
- Rinse thoroughly with lukewarm water, using gentle circular motions to provide light exfoliation.
- Pat (don’t rub) your face dry with a clean, soft towel.
- Apply an alcohol-free toner to rebalance your skin’s pH.
- Follow with a hydrating serum containing niacinamide or vitamin C for enhanced brightening effects.
- Seal in the benefits with a moisture-rich cream or facial oil.
- Apply SPF 30+ the following morning (essential when using any brightening treatment).
Pro Tips for Radiant Results
Avoiding Irritation
- Start with once-weekly treatments, gradually increasing to 2-3 times weekly as your skin adjusts.
- Dilute acids (like lemon juice) with rose water or aloe vera gel to reduce potential irritation.
- If you have sensitive skin, reduce treatment time by 50% for your first several applications.
- Always wear sunscreen daily when using any brightening treatments to prevent rebound pigmentation.
Recommended Tools
- Soft facial brush for even, hygienic application
- Silicone mixing bowl for easy cleanup
- Measuring spoons for precise ingredient amounts
- Clean muslin cloths for gentle removal
- Glass containers with tight lids for storing any leftover product
Storage & Reuse
- Refrigerate unused portions in an airtight container for up to 3 days.
- Fresh is always best—ingredients like vitamin C oxidize quickly and lose efficacy.
- Add a drop of vitamin E oil to extend shelf life slightly without compromising effectiveness.
- Discard any mixture that changes color, texture, or smell, as this indicates spoilage.
Custom Variations for Different Skin Needs
For Dry, Dehydrated Skin
- Add ½ teaspoon avocado oil or jojoba oil to the base mask
- Incorporate mashed banana for additional moisture and gentle exfoliation
- Use manuka honey instead of regular honey for enhanced hydrating properties
- Follow with a hyaluronic acid serum to lock in moisture
For Oily, Acne-Prone Skin
- Increase yogurt to 2 tablespoons to provide additional lactic acid
- Add ¼ teaspoon green tea powder for oil control and antioxidant protection
- Incorporate 1 teaspoon of kaolin clay to absorb excess sebum
- Follow with a light, oil-free moisturizer
For Sensitive, Reactive Skin
- Skip citrus ingredients and use cucumber juice instead
- Reduce turmeric to a pinch to avoid potential irritation
- Add 1 teaspoon colloidal oatmeal to soothe and calm reactive skin
- Incorporate chamomile tea (cooled) as a gentle anti-inflammatory base
For Mature Skin with Hyperpigmentation
- Add ½ teaspoon mashed papaya for enhanced enzymatic exfoliation
- Incorporate ¼ teaspoon licorice root powder, a natural tyrosinase inhibitor
- Mix in a few drops of rosehip seed oil for vitamin A benefits
- Follow with a peptide-rich serum to support collagen production
Best Times to Use These Brightening Treatments
Routine Placement
These natural brightening treatments work best when integrated strategically into your skincare routine:
- Evening Application: Apply after cleansing and toning but before serums and moisturizers to allow active ingredients to penetrate effectively.
- Post-Exfoliation: Schedule masks after gentle physical or chemical exfoliation (not on the same day) when skin is primed to receive actives.
- Seasonal Transitions: Increase frequency during seasonal changes when skin often experiences more dullness and uneven tone.
Suggested Frequency
- Normal/Combination Skin: 2-3 times weekly
- Sensitive Skin: Once weekly, gradually increasing as tolerated
- Oily/Acne-Prone Skin: 2-3 times weekly, focusing on problem areas
- Mature Skin: 2 times weekly, alternating with hydrating treatments
Pre-Event Brightening Protocol
For special occasions when you want your skin to look especially radiant:
- Begin 1-2 weeks before your event, using gentle brightening treatments every 3 days
- Three days before, switch to hydration-focused masks
- The day before, use a gentle rice water rinse followed by intense hydration
- Day-of, apply a honey and yogurt flash mask for 5-10 minutes before your skincare routine
FAQs About Natural Brightening Treatments
Are these remedies suitable for all skin types?
While these natural brightening treatments use gentle ingredients suitable for most skin types, those with extremely sensitive skin or specific conditions like rosacea should proceed with caution. Always patch test and consider consulting a dermatologist if you have underlying skin conditions.
How long until I see results from natural brightening treatments?
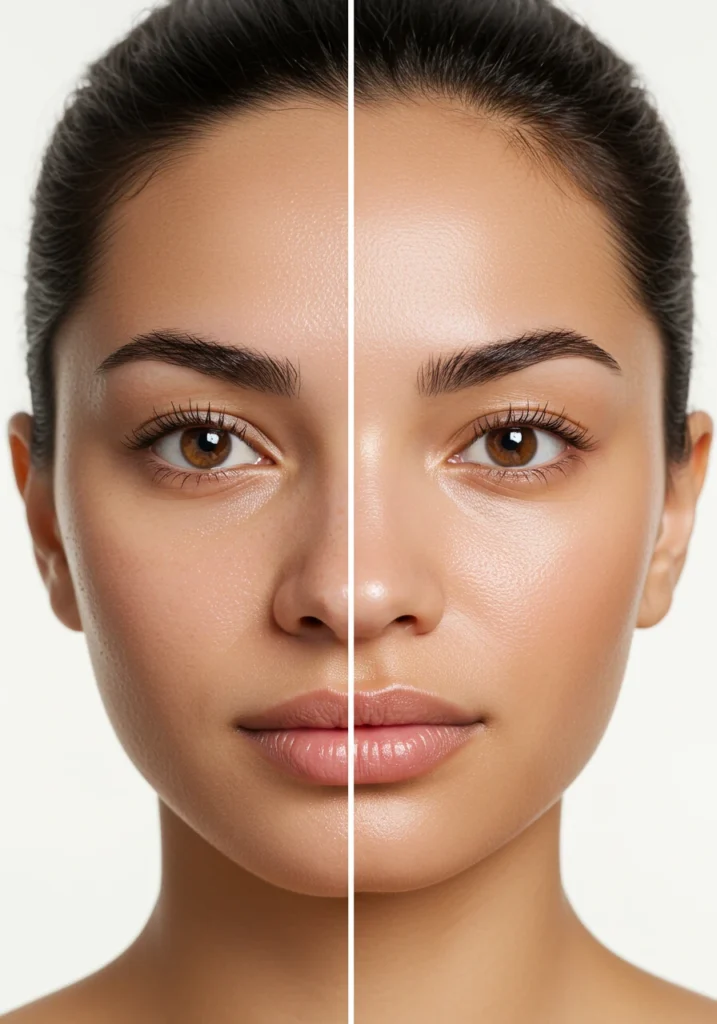
Natural brightening treatments typically show initial results (increased radiance, more even tone) within 2-3 weeks of consistent use. For more significant concerns like stubborn hyperpigmentation, expect 6-8 weeks of regular application to see noticeable improvement.
Can I combine these DIY treatments with commercial brightening products?
Yes, but with caution. Avoid using multiple active ingredients simultaneously (for example, don’t apply a vitamin C serum immediately after a lemon-based mask). Space your treatments appropriately and listen to your skin—if irritation occurs, simplify your routine.
Will these treatments completely eliminate dark spots and hyperpigmentation?
Natural treatments can significantly fade hyperpigmentation and even skin tone over time, but severe discoloration may require professional treatments. These methods work best for mild to moderate concerns and for maintenance after professional treatments.
How can I enhance the effectiveness of these natural brightening treatments?
Consistency is key. Additionally, support your brightening treatments with:
- Daily sun protection (SPF 30+ minimum)
- Adequate hydration (both topical and internal)
- A diet rich in antioxidants and vitamins
- Regular, gentle exfoliation to remove dead skin cells
Can pregnant women use these natural brightening treatments?
Most ingredients are pregnancy-safe, but always consult your healthcare provider. Generally, avoid treatments containing essential oils, salicylic acid, and retinol during pregnancy. Yogurt, honey, and oatmeal-based masks are typically considered safe options.
How should I adjust these treatments for winter vs. summer months?
In winter, focus on hydrating brightening ingredients like honey and avocado, reducing the frequency of exfoliating treatments. In summer, emphasize antioxidant protection alongside your brightening routine, and be especially vigilant about sun protection.
Conclusion
Achieving naturally radiant skin doesn’t require expensive treatments or harsh chemicals. These seven natural brightening approaches harness the power of nature’s most effective ingredients to reveal your skin‘s inherent luminosity. With consistent application and a holistic approach to skin health, you’ll notice not just a brighter complexion but an overall improvement in your skin’s texture, tone, and vitality.
Remember that patience is key—natural methods work gradually but provide sustainable results without the risk of irritation or rebound pigmentation often associated with stronger chemical alternatives. Start with the formulation that best addresses your primary concerns, and don’t hesitate to adjust ingredients as your skin responds.
Thousands of readers have transformed their dull, uneven complexions using these gentle yet powerful remedies. Your journey to naturally radiant skin starts in your kitchen with simple, pure ingredients that respect your skin’s natural processes while encouraging its luminous potential.