Table of Contents
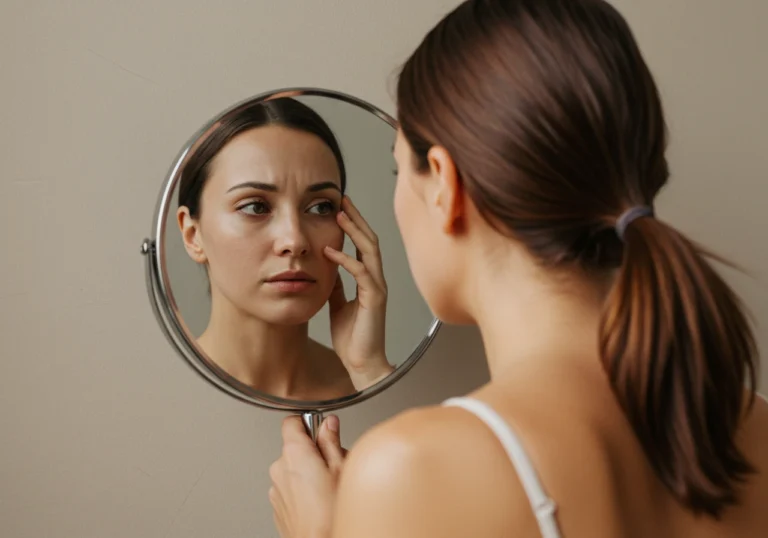
Did you know that nearly 85% of people will experience acne at some point in their lives? If you’re tired of battling stubborn breakouts and uneven skin texture, the solution might be simpler than you think—and it’s right in your kitchen pantry.
The journey to clear, radiant skin can feel overwhelming with countless products promising miracle results—often with hefty price tags and ingredient lists you can barely pronounce. Yet some of the most effective treatments don’t require expensive creams or complicated routines.
After years of experimenting with natural ingredients and researching traditional remedies, I’ve discovered seven powerful, science-backed natural treatments that deliver noticeable results without harsh chemicals. These remedies have not only transformed my own skin’s clarity and texture but have become trusted solutions for thousands of readers facing similar skin concerns.
Whether you’re dealing with occasional breakouts, persistent acne, or simply want to maintain a clear complexion, these accessible home treatments offer effective alternatives to commercial products. In this comprehensive guide, you’ll discover exactly which ingredients work (and why), simple preparation methods, application techniques, and customization options for your specific skin type. I’ve also included expert tips and answered the most common questions to help you achieve that clear, confident glow you’ve been seeking.
Why These Skincare Remedies Work
Natural remedies have stood the test of time for good reason. Unlike many commercial products that mask symptoms with temporary fixes, these solutions work with your skin‘s natural processes to address underlying issues:
- Formulated with gentle, skin-loving ingredients that balance rather than strip your skin
- Support your skin‘s natural healing and regeneration processes
- Target multiple concerns simultaneously (inflammation, bacteria, oil production)
- No harsh chemicals, artificial fragrances, or potentially irritating preservatives
- Rich in antioxidants, vitamins, and minerals that nourish while treating
- Adaptable for all skin types with simple modifications
These remedies don’t just treat existing blemishes—they help prevent future breakouts by addressing the root causes of skin congestion and inflammation, making them perfect for maintaining consistently clear skin.
Choosing the Right Ingredients
Top Ingredients for Skin Clearing
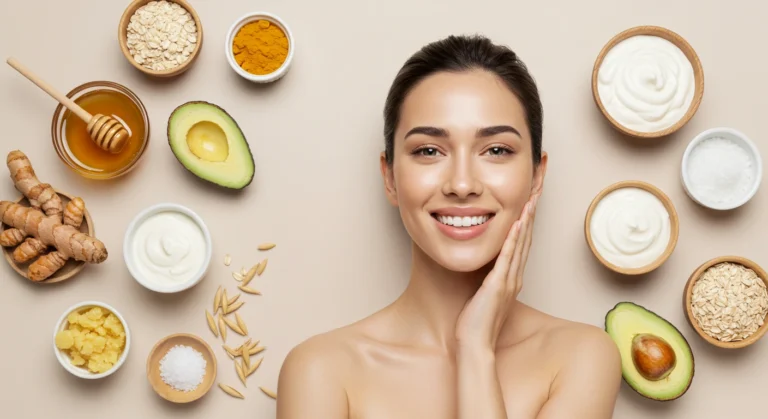
The most effective natural ingredients for achieving clear skin share certain properties—they’re anti-inflammatory, antimicrobial, and help regulate sebum production without over-drying. Here are the standout performers:
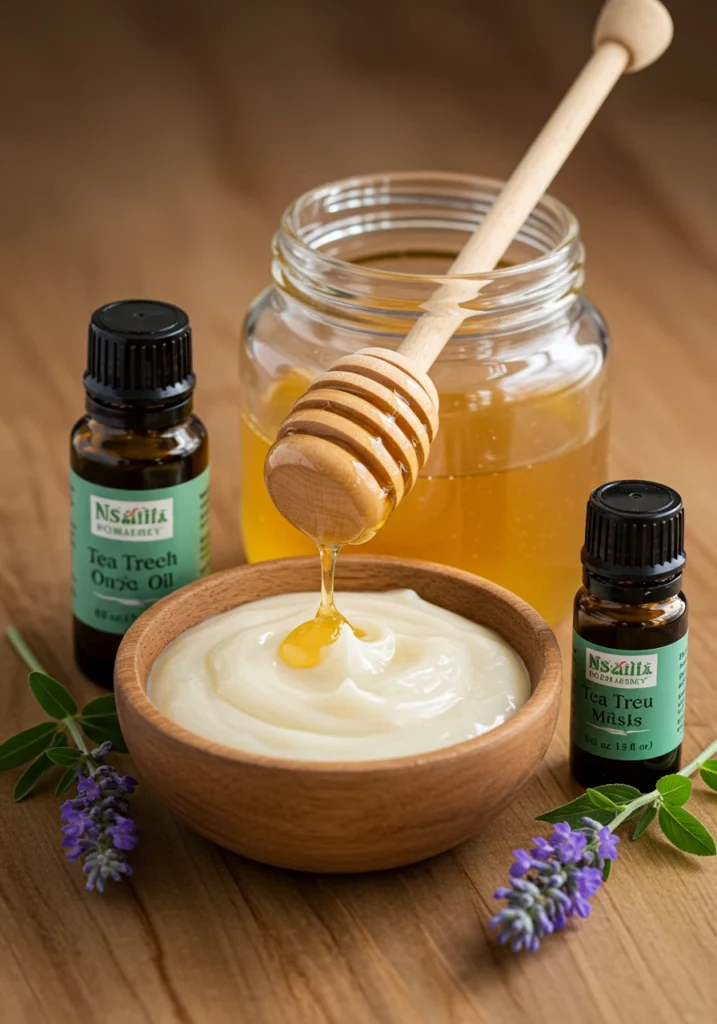
- Raw Honey: Nature’s antimicrobial wonder contains enzymes that gently exfoliate while fighting acne-causing bacteria. Manuka honey, in particular, offers superior antibacterial properties.
- Tea Tree Oil: Research shows this potent essential oil rivals benzoyl peroxide for acne treatment without the harsh side effects. Its natural antiseptic properties help clear blemishes and prevent new formations.
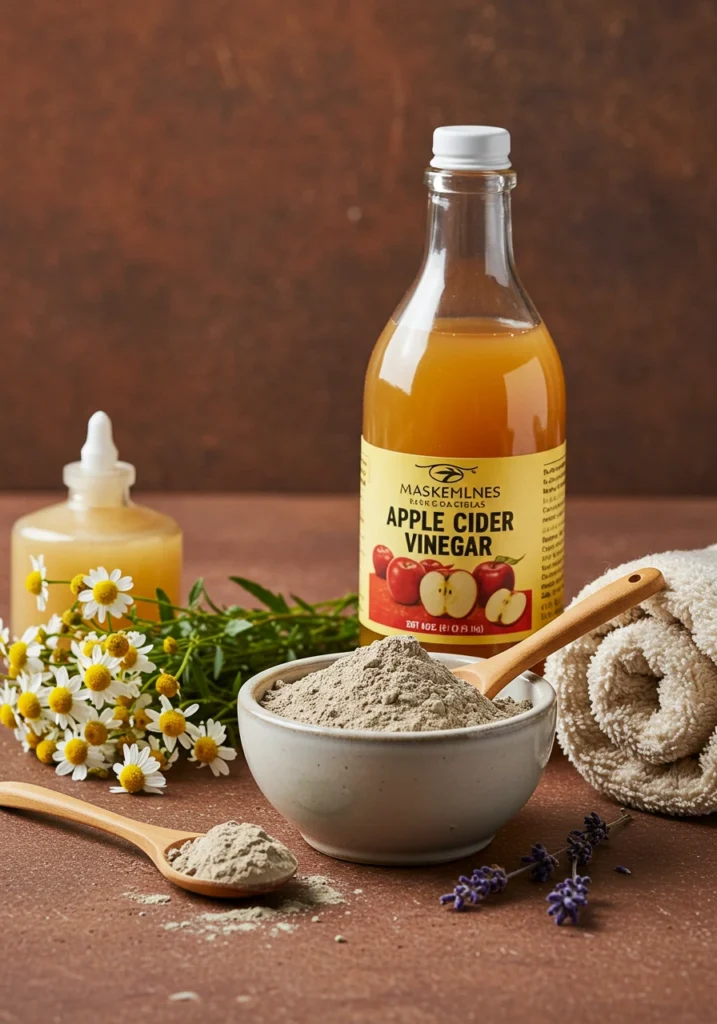
- Apple Cider Vinegar: The natural acids help restore your skin‘s pH balance while exfoliating dead skin cells that can clog pores.
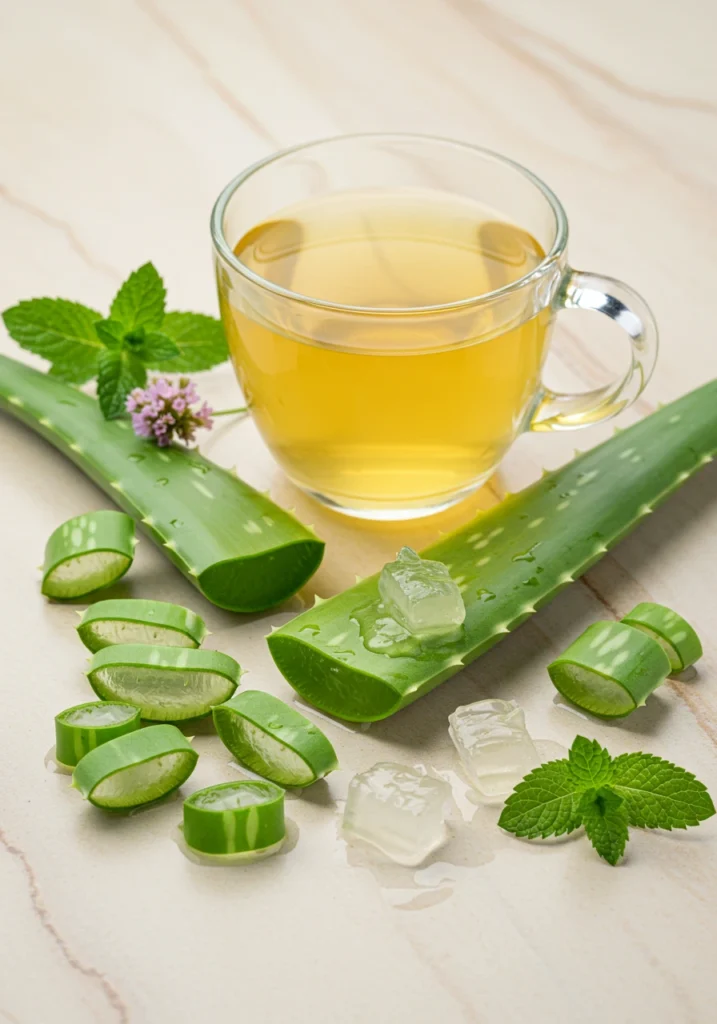
- Aloe Vera: Beyond soothing irritation, aloe contains salicylic acid and sulfur, both renowned for their acne-fighting abilities.
- Green Tea: Rich in antioxidants called catechins that reduce inflammation and fight bacterial infection while regulating oil production.
- Turmeric: Contains curcumin, a powerful anti-inflammatory compound that reduces redness and swelling while brightening skin tone.
- Clay (bentonite, kaolin): These mineral-rich earths draw impurities from deep within pores without stripping essential moisture.
What to Avoid
Even with natural ingredients, certain elements can trigger reactions or worsen skin conditions:
- Citrus Juices: While vitamin C is beneficial, direct application of lemon or lime juice can cause photosensitivity and irritation
- Cinnamon: Too stimulating for most skin types, often causing redness and burning
- Baking Soda: Disrupts the skin’s natural pH balance, potentially causing long-term barrier damage
- Undiluted Essential Oils: Always dilute with carrier oils to prevent sensitization and irritation
- Sugar Scrubs: Often too abrasive for acne-prone skin, potentially spreading bacteria and causing micro-tears
Substitutions
If certain ingredients don’t suit your skin or aren’t readily available:
- Yogurt instead of honey for those with bee allergies
- Witch hazel in place of apple cider vinegar for sensitive skin
- Oatmeal as an alternative to clay for gentle cleansing
- Rose water instead of plain water for added soothing benefits
- Jojoba oil in place of other carrier oils for acne-prone skin (closely mimics natural sebum)
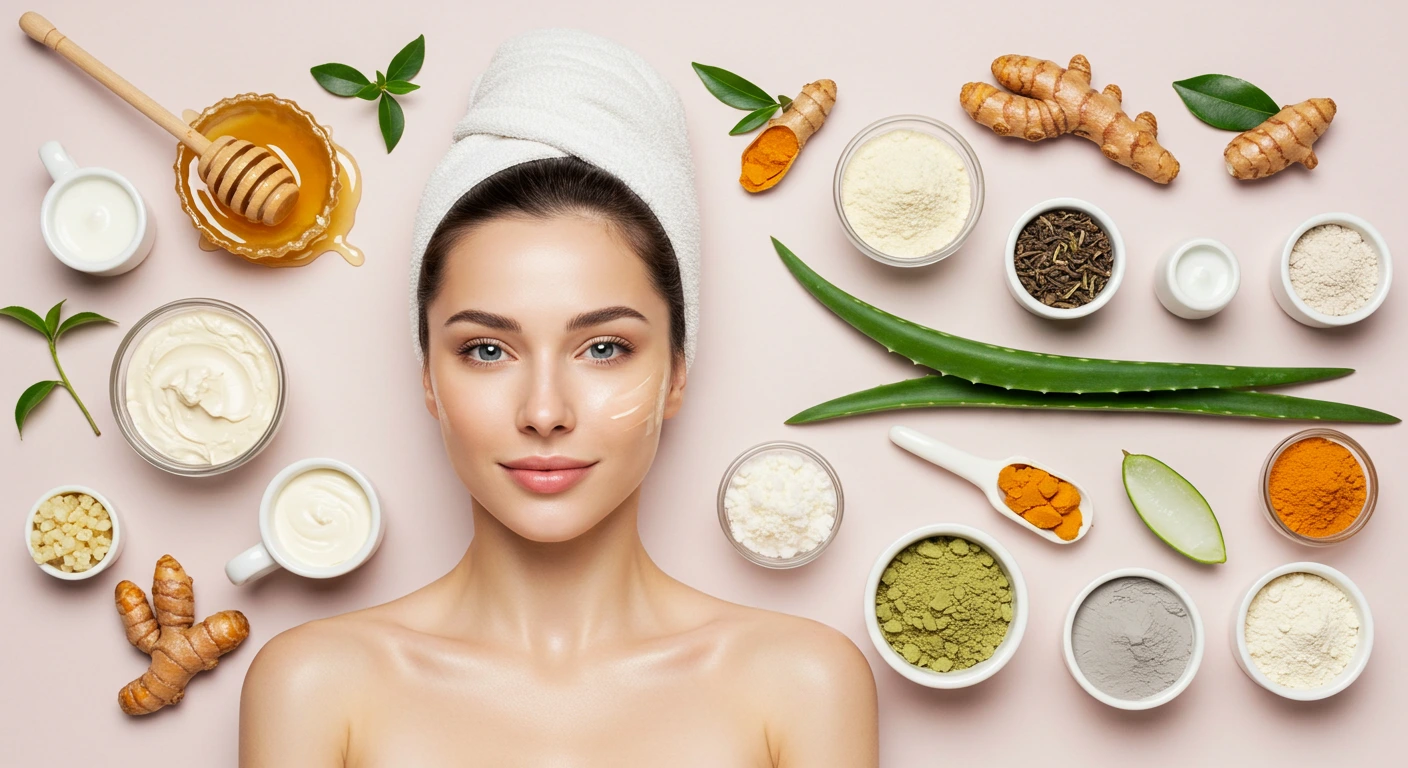
Ingredients & Prep
Prep Essentials
Cleanse Thoroughly
Use a gentle, sulfate-free cleanser to remove surface debris, makeup, and excess oil before applying any treatment. This ensures maximum absorption of beneficial ingredients and prevents trapping dirt under your mask.
Open Your Pores
Hold your face over a bowl of warm (not hot) water for 2-3 minutes to open pores and increase receptivity to treatment ingredients. Alternatively, apply a warm washcloth to your face for 30-60 seconds.
Patch Test First
Apply a small amount of your chosen remedy behind your ear or on your inner wrist and wait 24 hours to check for adverse reactions. This simple step can prevent potential irritation, especially when using potent ingredients like tea tree oil or turmeric.
Gather Clean Tools
Collect clean bowls, spoons, and applicators before beginning to prevent introducing bacteria to your skin or contaminating your ingredients. Glass or ceramic bowls are ideal, especially when working with clay treatments.
Prepare Your Space
Pull back hair with a headband or clips to keep treatment areas clear and protect your clothing with a towel or wear an old t-shirt, as some ingredients like turmeric can permanently stain fabrics.
DIY Mask Ingredients
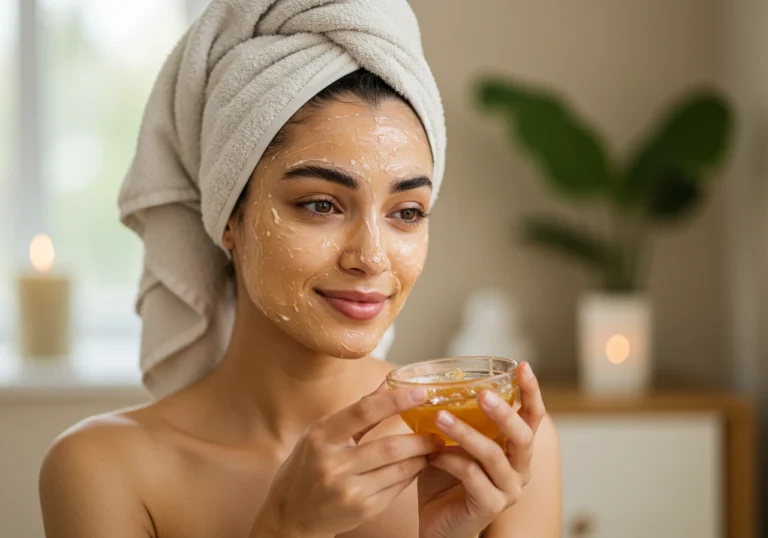
Honey & Tea Tree Clarifying Mask
- 1 tablespoon raw honey
- 2 drops tea tree essential oil
- ½ teaspoon turmeric powder
- 1 teaspoon plain yogurt (optional for creamier consistency)
Detoxifying Clay Treatment
- 1 tablespoon bentonite clay
- 1-2 tablespoons apple cider vinegar (until paste forms)
- 3 drops tea tree oil
- ½ teaspoon honey
Soothing Green Tea & Aloe Treatment
- 2 tablespoons strong brewed green tea (cooled)
- 1 tablespoon pure aloe vera gel
- ½ teaspoon honey
- Pinch of turmeric (optional)
Oil-Balancing Oatmeal Mask
- 2 tablespoons ground oats
- 1 tablespoon raw honey
- 1 teaspoon apple cider vinegar
- Few drops of tea tree oil
Pantry Staples
Keep these versatile ingredients on hand for quick treatments and combinations:
- Raw honey: Antibacterial, humectant, never expires
- Apple cider vinegar: Balances pH, exfoliates (with “mother” for best results)
- Tea tree essential oil: Fights bacteria, reduces inflammation
- Aloe vera gel: Soothes, heals, hydrates (refrigerate for extended shelf life)
- Ground oats: Gentle exfoliation, calms irritation
- Turmeric powder: Anti-inflammatory, brightening
- Plain yogurt: Probiotic benefits, gentle exfoliation from lactic acid
- Green tea: Antioxidant-rich, reduces oil production
- Bentonite clay: Draws out impurities, absorbs excess oil
Application Guide: When and How to Use These Remedies
Optimal Timing for Treatment
For best results, apply these treatments in the evening whenever possible. This timing is ideal because:
- Your skin enters repair mode naturally at night
- Some ingredients (particularly tea tree oil and turmeric) can cause temporary sensitivity to sunlight
- Evening application allows ingredients more time to work without makeup or environmental exposure
- You can follow with overnight hydration for enhanced benefits
Strategic timing can also boost effectiveness:
- Apply treatments 1-2 days after physical or chemical exfoliation, never immediately after
- Increase frequency during summer or humid periods when oil production rises
- Time treatments to coincide with hormonal breakout patterns (often pre-menstrual for women)
- For special events, apply clearing treatments two days before, then switch to hydrating masks the day prior
Step-by-Step Application Process
1. Preparation
- Cleanse first: Always start with clean skin using a gentle, non-stripping cleanser
- Open pores: Apply a warm washcloth to your face for 30 seconds or lean over a bowl of steaming water for 2-3 minutes
- Mix fresh: Combine ingredients immediately before application for maximum potency
- Protect surfaces: Place a towel down if using ingredients like turmeric that may stain countertops
2. Application Technique
- Using clean fingertips or a silicone mask brush, apply a moderate layer across problem areas or your entire face
- Avoid the delicate eye area, nostrils, and lips
- Apply evenly with a thickness that’s visible but not dripping (approximately 1/8 inch)
- For combination skin, consider applying different formulations to different facial zones
3. Treatment Duration
- Honey-based masks: 15-20 minutes
- Clay treatments: 10-15 minutes (remove before completely dry to prevent over-drying)
- Aloe treatments: 15-30 minutes
- Oatmeal formulas: 15-20 minutes
4. Removal and Aftercare
- Rinse thoroughly with lukewarm (never hot) water using gentle splashing motions
- For stubborn masks, soften dried clay or honey with a warm, damp washcloth before rinsing
- Pat (don’t rub) skin dry with a clean towel
- Apply alcohol-free toner to restore pH balance (witch hazel or rose water work well)
- Follow with a lightweight, non-comedogenic moisturizer
- For persistent blemishes, apply a tiny amount of diluted tea tree oil directly to the spot
[THIS WOULD BE AN IDEAL PLACE FOR AN INFOGRAPHIC showing the simple 4-step process with icons for each step]
Treatment Frequency
- For active breakouts: Apply every 2-3 days until significant improvement (maximum 3x weekly)
- For maintenance: Once-weekly treatments maintain clear skin after initial improvement
- For prevention: Bi-weekly applications during stress periods or seasonal changes
- For sensitive skin: Begin with once-weekly treatments, gradually increasing as tolerance develops
Remember to rotate between different remedies rather than using the same one consecutively, and always listen to your skin—adjust frequency based on how it responds.
Pro Tips for Radiant Results
Avoiding Irritation
- Start slow: Begin with once-weekly treatments, gradually increasing to 2-3 times weekly as tolerance develops
- Dilution is key: Always dilute potent ingredients like tea tree oil and apple cider vinegar according to guidelines
- Watch for signs: If burning, excessive redness, or discomfort occurs, remove immediately
- Sunscreen necessity: Always use SPF the morning after treatments, especially those containing fruit acids or tea tree oil
- Hydration balance: Counter any drying effects with proper moisture—dehydrated skin often produces more oil
Recommended Tools
- Silicone mask brush: Provides even application without absorbing product
- Glass or ceramic bowls: Avoid metal when mixing clay treatments
- Measuring spoons: Ensures proper proportions for consistent results
- Soft microfiber cloths: Gentler than regular towels for removal
- Spray bottle: Ideal for misting treatments that might dry out
- Headband or clips: Keeps hair away from face during treatment
- Timer: Prevents leaving treatments on too long
Storage & Reuse
- Single-use ideal: For maximum potency and hygiene, mix fresh batches each time
- Limited storage: If necessary, refrigerate unused portions in airtight glass containers for no more than 3 days
- Clay treatments: These typically cannot be stored once liquid is added
- Honey-based formulas: May be refrigerated up to 5 days if no dairy is included
- Preservation tips: Add a drop of grapefruit seed extract to extend shelf life slightly
- Visual checks: Discard if color changes, separation occurs, or unusual odors develop
Custom Variations
For Oily, Acne-Prone Skin
- Increase clay ratio: Add extra bentonite or kaolin clay to absorb excess sebum
- Add witch hazel: Replace water with witch hazel in formulations for astringent properties
- Incorporate zinc: Add ¼ teaspoon zinc oxide powder to reduce inflammation and oil production
- Try willow bark: Contains natural salicylic acid to fight breakouts (use as a tea base)
- Reduce honey: Use just enough for binding properties rather than moisturizing effects
For Combination Skin
- Zone treatment: Apply different formulations to different facial regions
- Balance with humectants: Include honey or glycerin to prevent over-drying while treating oily areas
- Yogurt base: Provides gentle exfoliation while maintaining hydration balance
- Green tea infusion: Helps regulate oil production without stripping
- Strategic application: Concentrate clay components on T-zone, gentler ingredients on cheeks
For Sensitive Skin
- Eliminate potential irritants: Remove tea tree oil, apple cider vinegar, and turmeric
- Focus on soothing: Increase aloe vera and colloidal oatmeal percentages
- Add anti-inflammatory herbs: Consider chamomile tea as a liquid base
- Reduce treatment time: Leave masks on for 5-10 minutes instead of the standard 15-20
- Patch test rigorously: Test each ingredient individually before combining
For Dry or Mature Skin with Breakouts
- Enhance moisture: Add ½ teaspoon of jojoba or rosehip oil to formulations
- Incorporate honey: Increase the honey ratio for humectant properties
- Add hyaluronic acid: Mix a few drops of hyaluronic acid serum into treatments
- Avocado boost: Include ¼ mashed avocado for extra nourishment
- Reduce clay components: Use only minimal amounts of potentially drying ingredients
FAQs
Is it normal for my skin to purge after using these remedies?
While commercial actives (like retinol) often cause purging, natural remedies typically don’t trigger this response. If you experience new breakouts after treatment, it could indicate an ingredient sensitivity or reaction. Try eliminating potential triggers one by one or reduce treatment frequency.
Can these remedies replace my regular skincare routine?
These treatments work best as supplements to a consistent, gentle skincare routine—not replacements. Continue with your basic cleansing, toning, moisturizing, and sun protection while incorporating these remedies as targeted treatments.
How soon will I see results?
Most people notice immediate improvements in skin texture and inflammation after the first application. For significant clearing of persistent breakouts, consistent use for 2-3 weeks typically shows marked improvement. Severe or cystic acne may require professional treatment alongside these remedies.
Are these remedies suitable for sensitive skin?
Many ingredients (particularly honey, aloe, and oatmeal) are excellent for sensitive skin. However, others like tea tree oil and apple cider vinegar should be used cautiously. Always patch test, start with gentler formulations, and dilute active ingredients more thoroughly.
Can I use these remedies with prescription acne medications?
Use caution when combining with prescription treatments. Many acne medications already cause dryness and sensitivity, which could be exacerbated by additional treatments. Consult your dermatologist, and consider using only the gentlest formulations (honey and aloe-based) as occasional supplements.
How do I know which remedy is right for my skin?
Consider your primary skin concerns: For oily skin with blackheads, clay-based treatments work best. For inflammatory acne with redness, focus on honey and tea tree formulations. For sensitive skin with occasional breakouts, aloe and oatmeal provide gentle care. Start with the most appropriate remedy and adjust based on your skin’s response.
Can these remedies help with acne scars?
While these treatments primarily target active breakouts, several ingredients can help fade hyperpigmentation over time. Turmeric, honey, and green tea all contain properties that may gradually improve discoloration. However, deeper textural scarring requires professional interventions like microneedling or laser therapy.
Conclusion
The journey to clear skin doesn’t need to involve harsh chemicals or expensive treatments. These seven natural remedies harness the power of ingredients that have stood the test of time, offering effective solutions for various skin concerns while supporting your skin‘s natural healing processes.
Consistency is key—incorporate these treatments into your regular skincare routine, pay attention to how your skin responds, and adjust as needed. Remember that clear skin is influenced by many factors beyond topical treatments, including diet, stress management, and adequate sleep.
Ready to transform your skin naturally? Start with the remedy that best addresses your specific concerns today, and watch as your complexion becomes clearer, calmer, and more radiant with each treatment. The power of nature’s pharmacy is literally at your fingertips!
Share your results with us in the comments below or tag us in your before-and-after photos on social media. Have you discovered your own natural skincare remedy that works wonders? We’d love to hear about it!
For more personalized guidance on your skincare journey, don’t forget to sign up for our newsletter where we share exclusive tips, new remedy formulations, and special offers on our natural skincare products. Your clear skin journey starts now!